Price a conference
A conference has one base ticket price that covers every session. On top of that you can add a cheaper non-CEU ticket, a VIP add-on, a scheduled price change with a countdown, and a one-click offer for people who bought a single session.
This may not be turned on for your organization
Open the pricing settings
Open your conference from Content, then the Conferences tab. Click Edit details and scroll to Pricing.
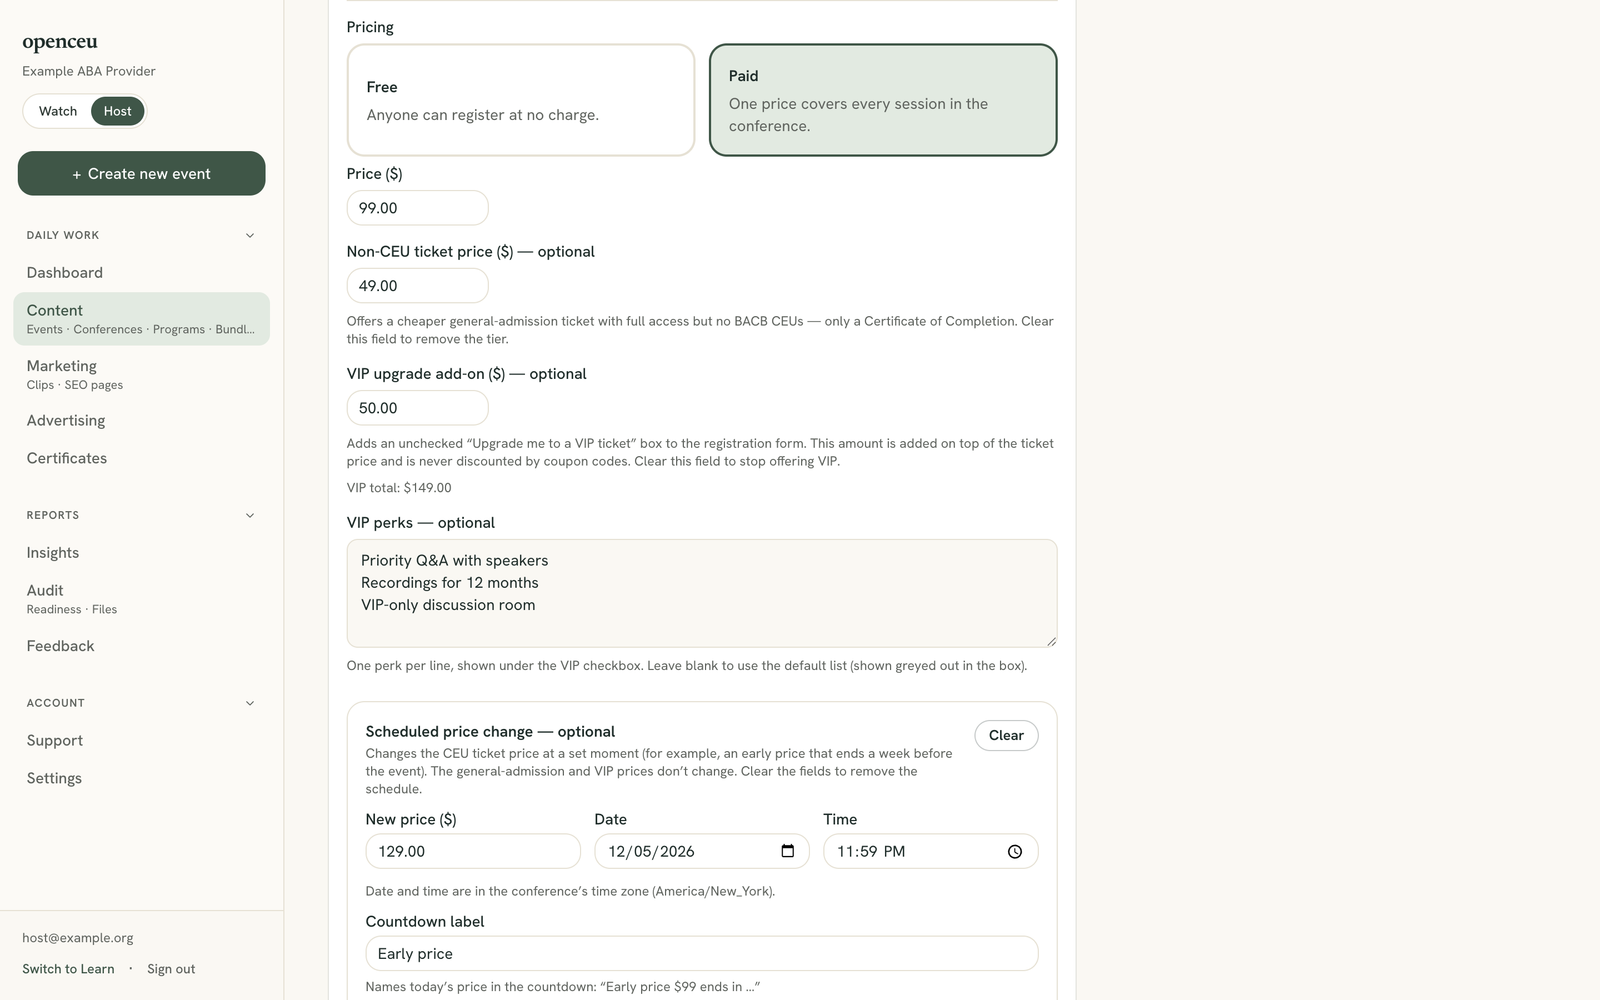
Choose Free or Paid. Free means anyone can register at no charge. Paid shows Price ($): one price that covers every session in the conference. All the options in this guide sit under this field and only appear when Paid is selected. A test conference can’t be paid.
Click Save Changes at the bottom of the page when you are done.
Add a non-CEU ticket (optional)
Fill in Non-CEU ticket price ($) — optional to offer a cheaper general-admission ticket. It gives full access to the conference, but no CEUs. Those buyers get a Certificate of Completion instead. Clear the field to remove the tier.
Registration then shows both prices side by side, as CEU ticket and General admission. If the non-CEU price is not lower than the CEU price, the form shows a warning, since the cheaper ticket would make no sense.
Buyers can upgrade later
Offer a VIP add-on (optional)
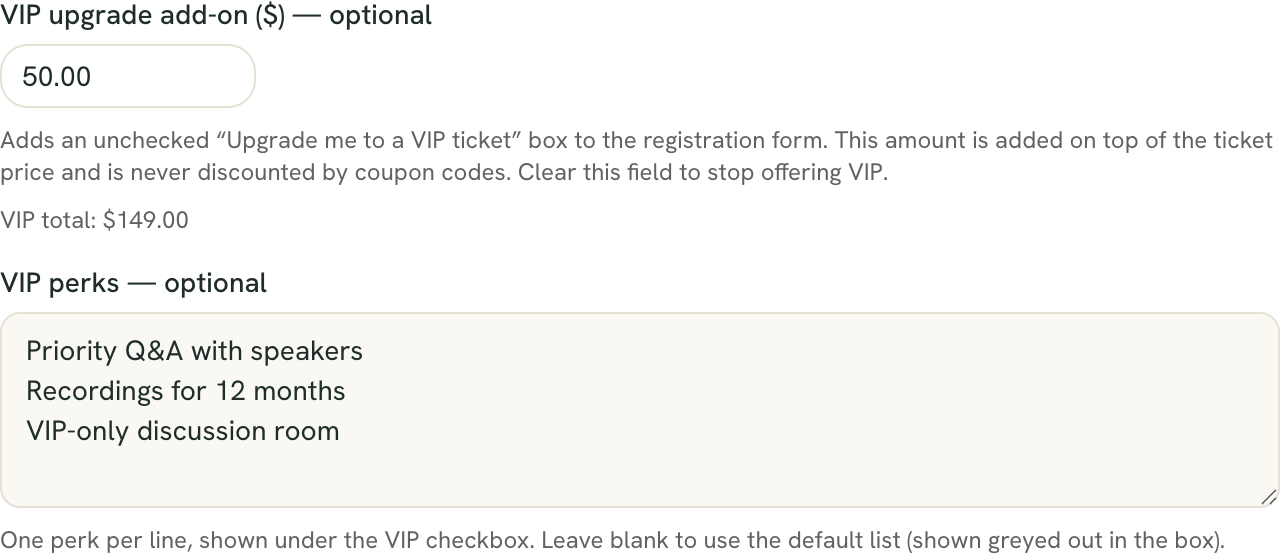
Fill in VIP upgrade add-on ($) — optional to add an unchecked box, Upgrade me to a VIP ticket, to the registration form. The amount is added on top of the ticket price. As you type, the form shows the VIP total. Clear the field to stop offering VIP.
Coupon codes never discount the VIP amount. See Create discount codes for how coupons work.
Use VIP perks — optional to say what VIP includes. Write one perk per line, up to 2,000 characters. The perks show under the VIP checkbox. Leave it blank and the default perk list shows instead, in grey, inside the box. Check that the default list matches what you actually deliver before you leave it blank.
VIP buyers show up in your registrations. See Conference registrants and reports.
Schedule a price change (optional)
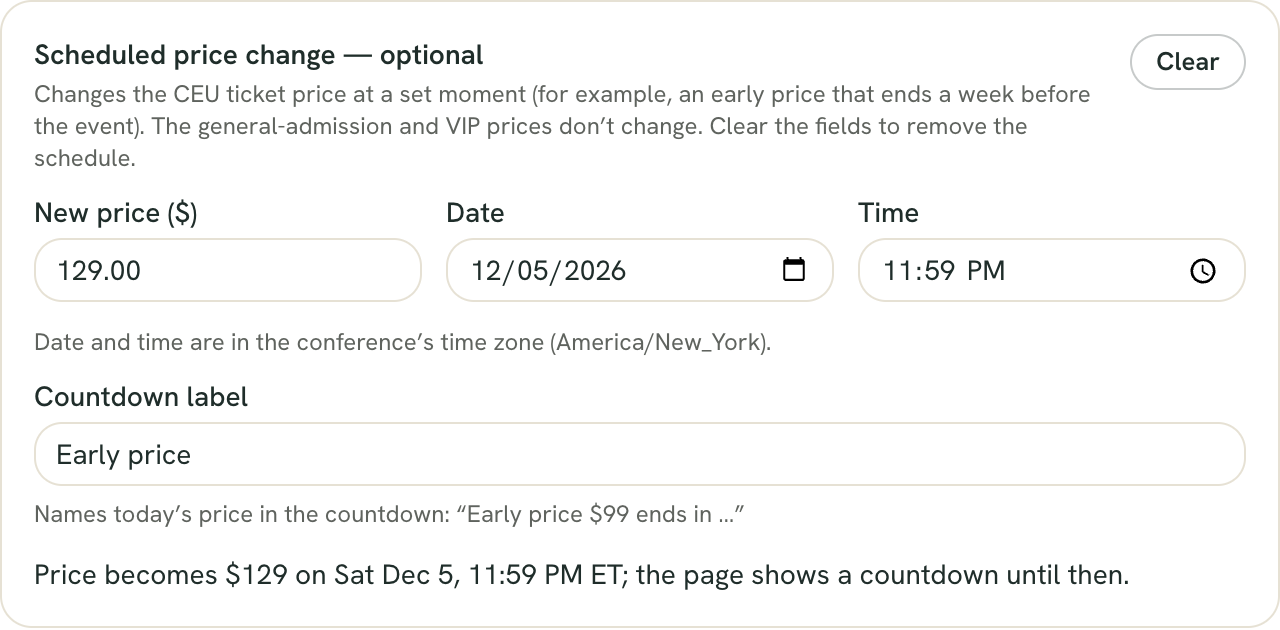
Use Scheduled price change — optional for an early price that ends on a set date. Fill in:
- New price ($): the CEU ticket price after the change.
- Date and Time: when the new price starts. These are in the conference’s time zone, which the form shows. It must be a moment in the future.
- Countdown label: names today’s price in the countdown. It defaults to “Early price”, so the countdown reads “Early price $X ends in …”.
A line under the fields previews the change, for example “Price becomes $X on …”. Checkout charges the new price from that moment on, with no action from you. The change only affects the CEU ticket. The general-admission and VIP prices stay the same. Click Clear to remove the schedule.
When the countdown shows
Using your own HTML page?
Offer the rest of the conference to single-session buyers (optional)
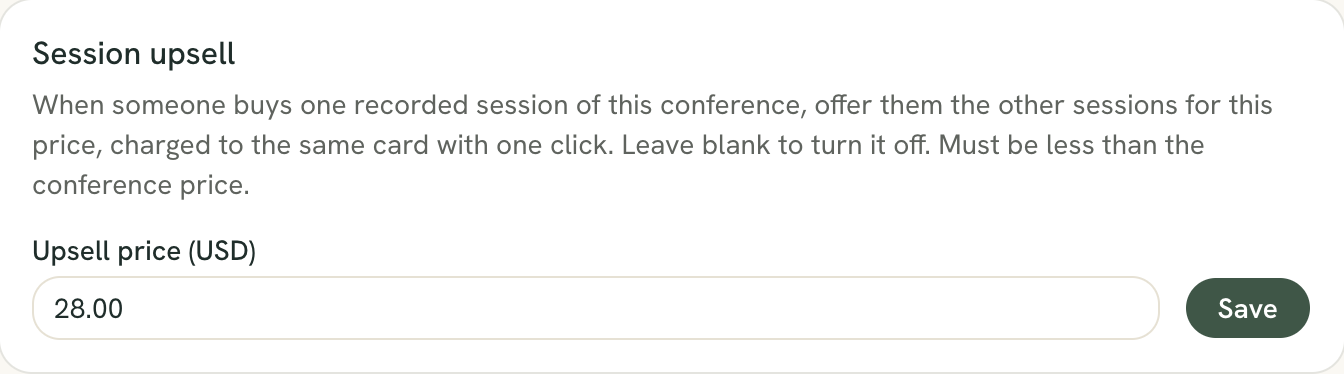
After you save, a separate card named Session upsell appears below the form on the same page. It only shows for a paid, non-test conference. Enter an Upsell price (USD) and click Save.
When someone buys one recorded session of this conference, they are offered the other sessions at that price, charged to the same card with one click. The price must be less than the conference price. Leave it blank to turn it off. Certificates stay per session.
What changes when the conference is on demand
There is no setting for this. A conference switches to recordings mode on its own once every session has ended and every session that awards CEUs has a published recording you can watch. Sessions that award no CEUs don’t need a recording.
From then on, buyers see recording language instead of live language:
- The register button reads Get instant access with the price, for example “Get instant access — $47.00”. A free conference reads Get free instant access.
- The dates show as “Recorded” with your date range, with an On demand tag. The agenda details switch to what the buyer gets: sessions ready to watch, one certificate per session after its quiz.
- The confirmation email and the line item on Stripe’s checkout page describe on-demand recordings. The page for someone who is already registered links to watch the sessions instead of showing dates to add to a calendar.
Your prices carry over. Check any scheduled price change and your coupons before the conference ends, since the same prices now sell the recordings. If you see your page change after the event, this is why.
Still stuck? Contact support and we'll help.