Set up event emails
OpenCEU sends a confirmation and a post-event follow-up automatically. You choose whether reminders go out too.
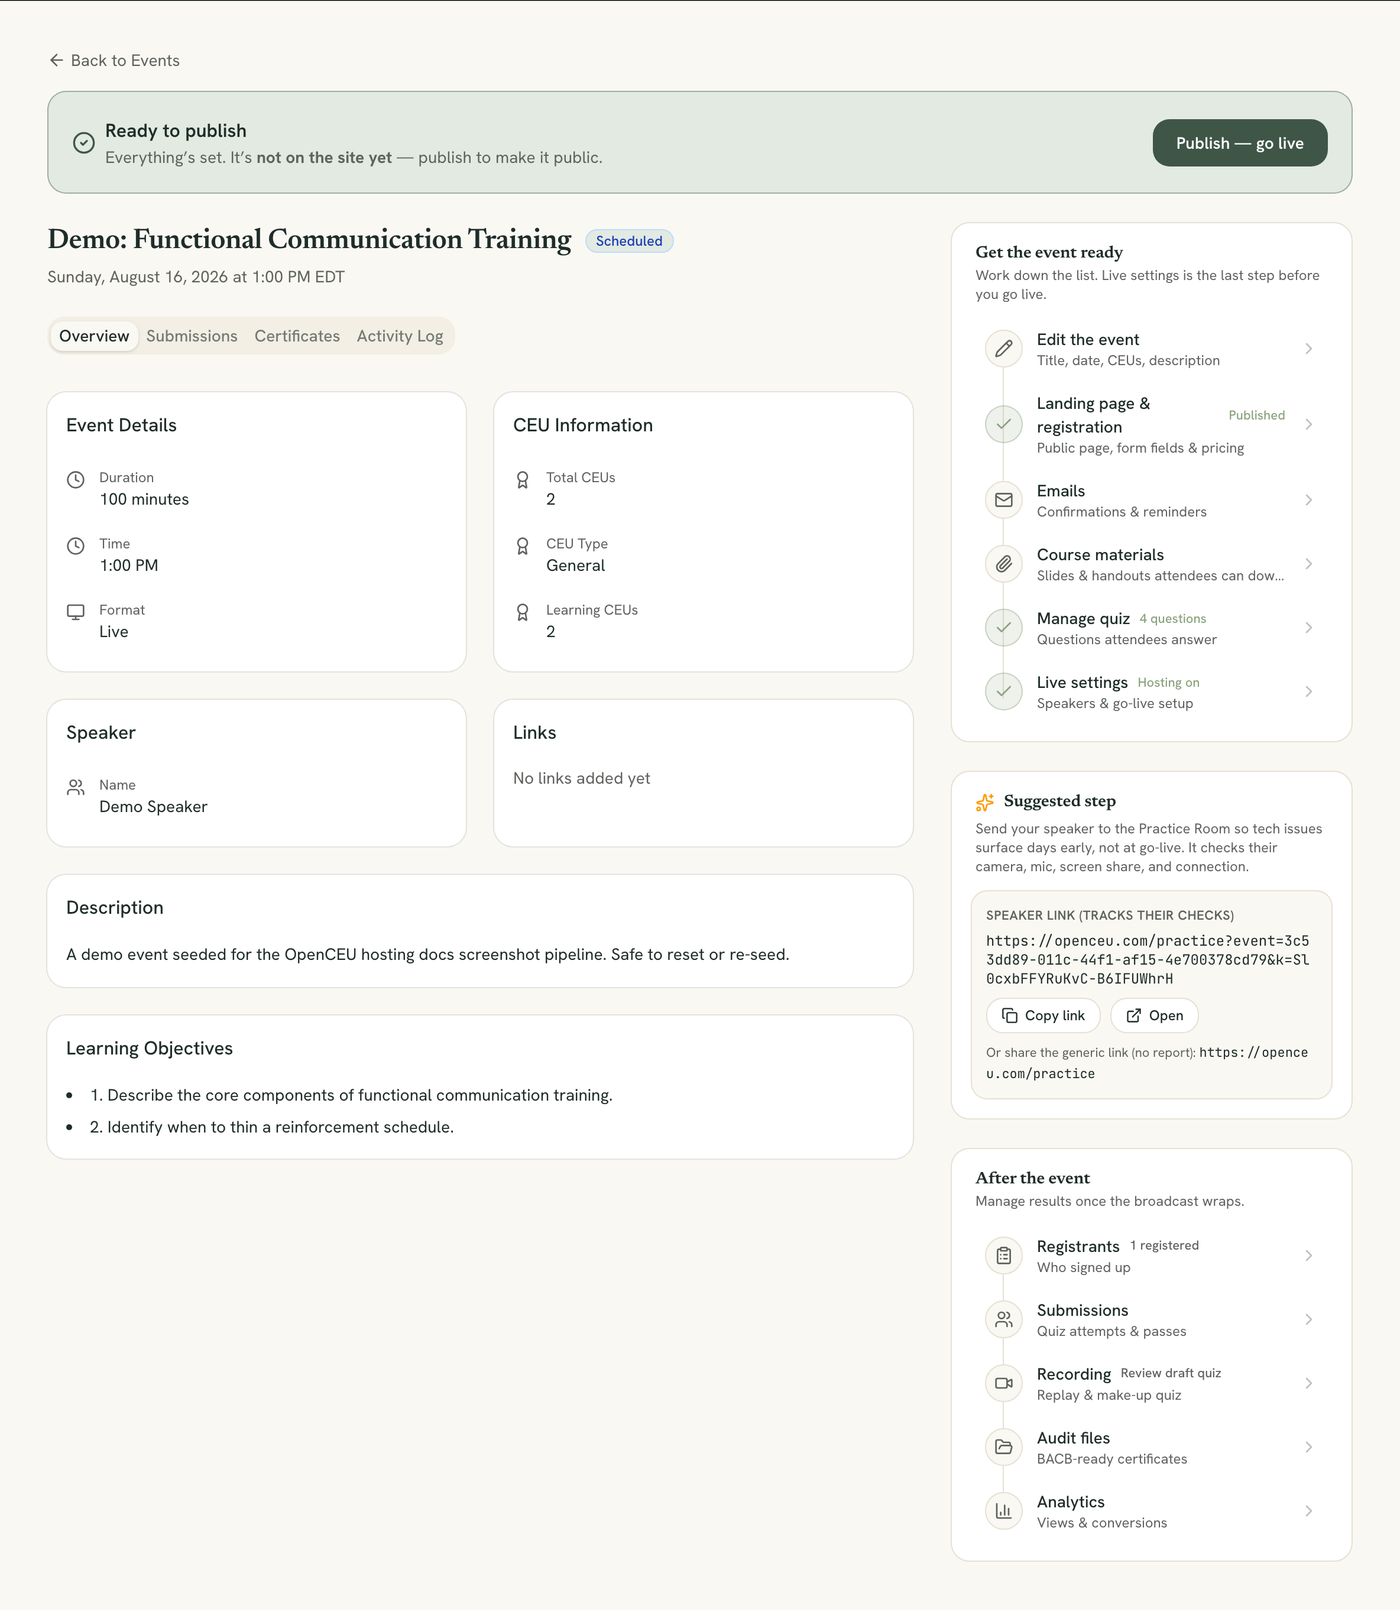
Open Emails from your checklist
Open your event, then click Emails in the checklist.
Turn reminders on or off
Check or uncheck 1 Week Before, 24 Hours Before, and 30 Minutes Before. The confirmation email and the post-event follow-up cannot be turned off. The follow-up sends when you approve the recording quiz, not on a timer.
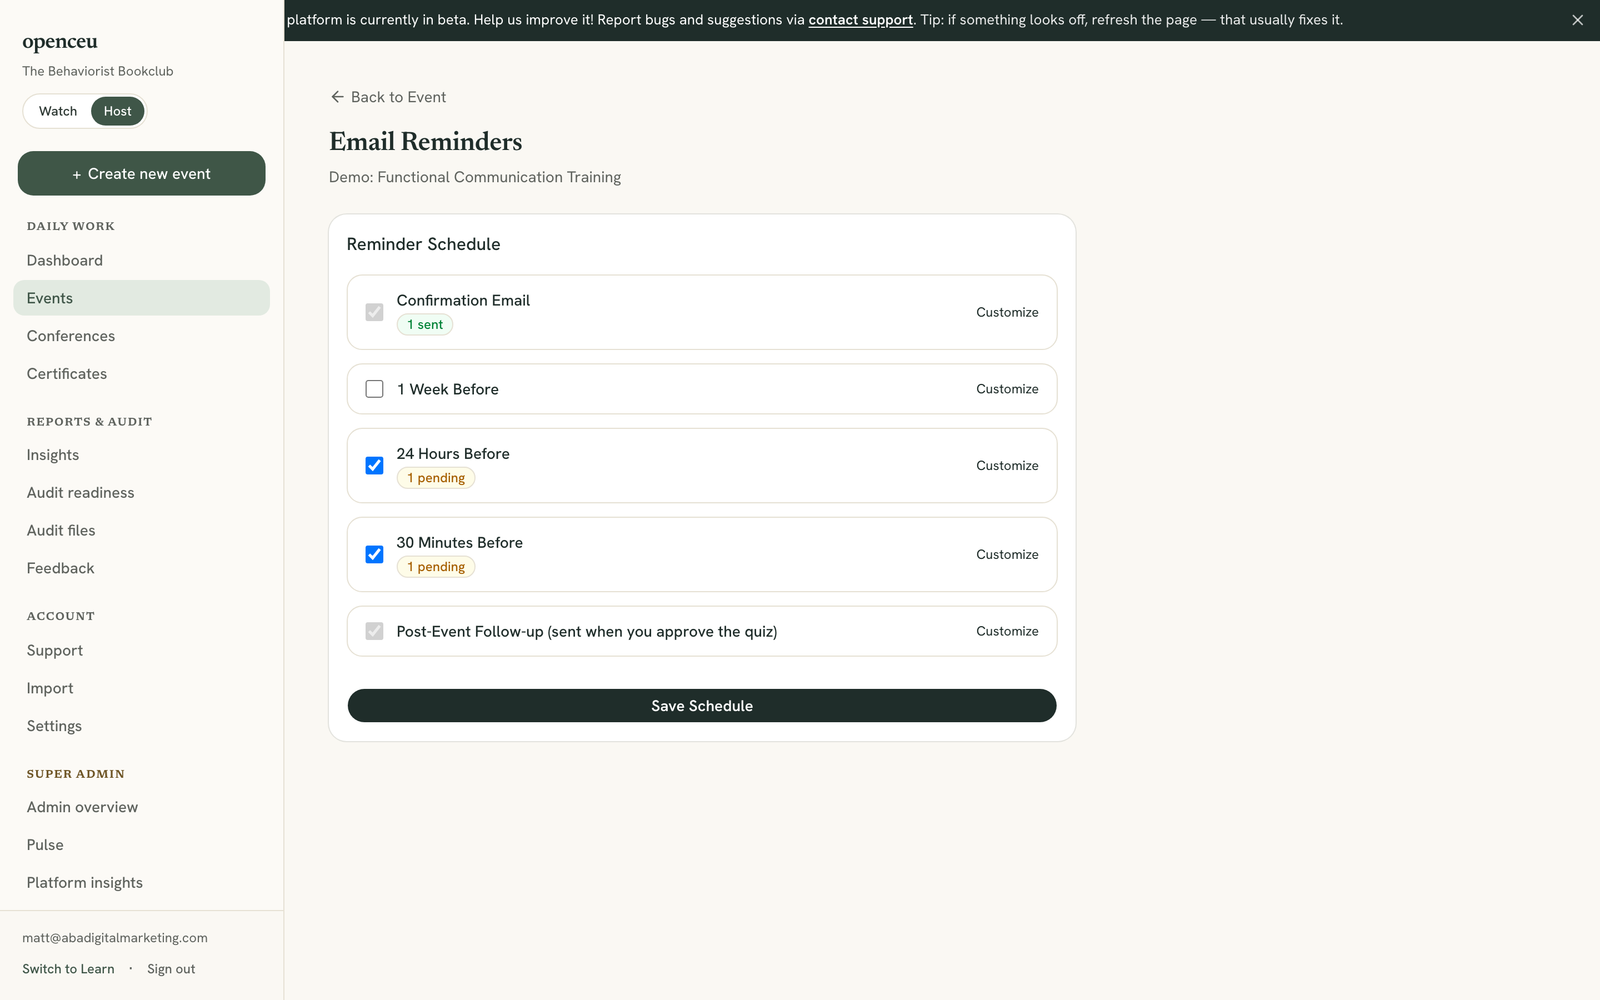
Save the schedule
Click Save Schedule.
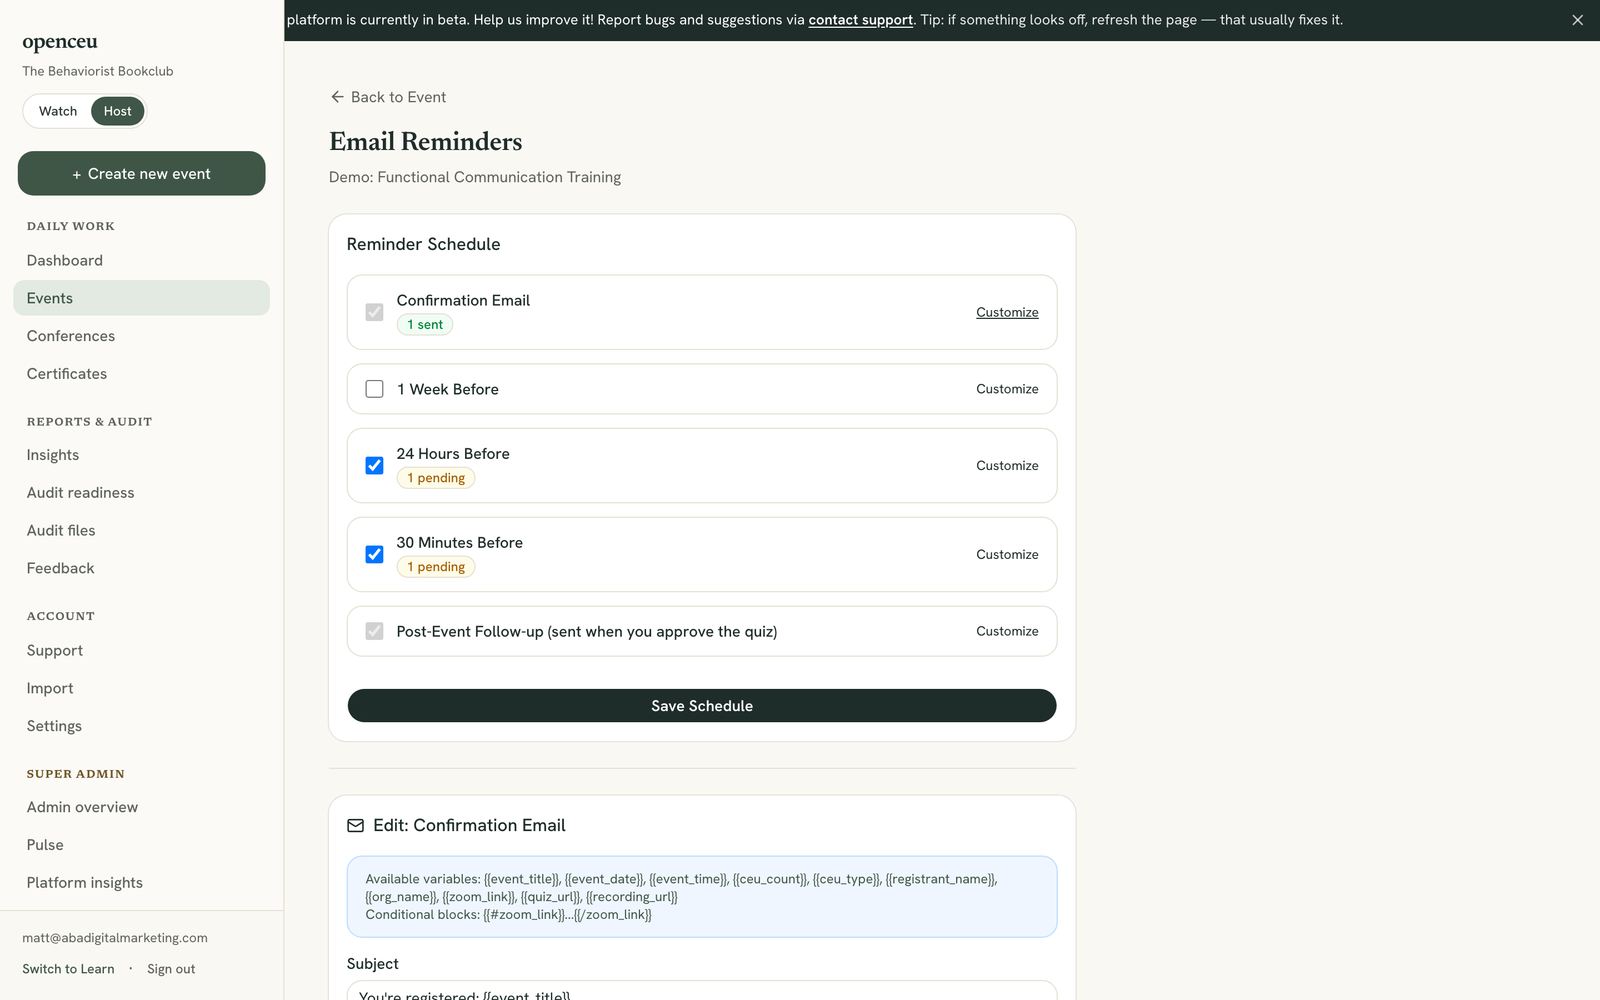
Customize an email, if you want
Click Customize next to any email. Edit the Subject and the body with the formatting toolbar, or click View HTML to edit the raw code. Insert variables like {{event_title}} or {{registrant_name}} anywhere in the text.
Click Save Template when you are done.
Reset to the default, if needed
Once you have customized an email, a small reset icon appears next to it. Click it to discard your changes and go back to OpenCEU’s default wording.
Conditional content
{{#zoom_link}}...{{/zoom_link}}. That block only shows if the event has a link set, so you don’t have to worry about a blank line appearing.If you move the event
Still stuck? Contact support and we'll help.